

Hey, young mechanics! Today we’ll learn about wheel bearing dust caps. They are small but important! Dust caps protect bearings inside your wheels from dirt and water. Keeping these clean helps your wheels ‘spin round’ without trouble!
Let’s learn how to safely remove a dust cap! Always remember, safety comes first. Have an adult help you, and wear safety glasses!
Before You Begin
Make sure to have these tools:
- Screwdriver – to gently pry off the cap
- Hammer – to help with stubborn caps
- Cloth – to clean and not get dirty
- Pliers – sometimes needed for a tight grip
- Gloves – keep your hands clean
Is your car ready? It should be still and not moving. Park it on a flat place, and use brakes.

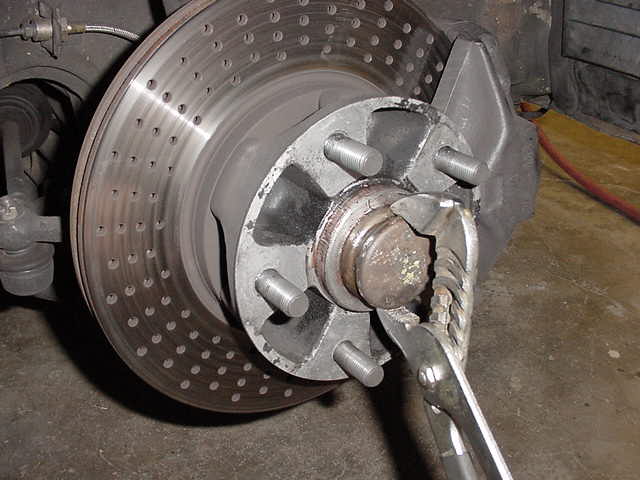
Credit: www.tacomaworld.com
Step-by-Step Guide
Step 1: Find The Dust Cap
First, look at the center of your wheel. There you’ll find the dust cap. It’s small and round.
Step 2: Clean Around The Cap
Use your cloth to wipe dirt around the cap. We need a clean place to work!
Step 3: Pry Off The Cap
Take your screwdriver and gently slide it under the cap’s edge. Twist lightly, but don’t push too hard. The cap might bend.
Step 4: Tap Gently With A Hammer
If the cap is stubborn, tap the screwdriver’s handle gently with the hammer. This can help loosen the cap.
Step 5: Use Pliers If Necessary
If the cap won’t come off, use your pliers. Grip the edge softly and wiggle side-to-side. But remember, be gentle!
Step 6: Remove The Cap
Once the cap is loose, lift it off. Do this with care. You did it!
Credit: forums.pelicanparts.com
After Removal
With the cap off, take a look inside. If everything looks clean, great! If there’s dirt, take your time and clean it out.
When putting the cap back, make sure it fits snug. Tap it lightly back into place with your hammer. If it’s too bent or damaged, it’s best to get a new one.
Troubleshooting Tips
| Problem | Tip |
|---|---|
| Cap Won’t Budge | Be patient and keep trying. If needed, use penetrating oil to help! |
| Cap is Damaged | If it is too bent or broken, get help to get a replacement. |
| Inside is Very Dirty | Clean thoroughly before replacing the cap, to keep wheels spinning nicely. |
Frequently Asked Questions On How To Remove Wheel Bearing Dust Cap
What Is A Wheel Bearing Dust Cap?
A wheel bearing dust cap is a protective cover that sits over the wheel bearing to prevent dirt, moisture, and contaminants from causing damage to the bearing assembly.
How Can I Identify A Damaged Dust Cap?
Look for signs of corrosion, dents, cracks, or grease leakage, which can indicate a damaged dust cap in need of replacement.
What Tools Are Needed To Remove A Dust Cap?
Generally, you’ll need a flathead screwdriver, pliers, a hammer, and potentially a dust cap removal tool for a safer and easier job.
Can I Reuse A Wheel Bearing Dust Cap?
If the dust cap isn’t damaged and fits snugly back in place, it can typically be reused after removal. Inspect it carefully before reinstallation.
Conclusion
Learning to remove a wheel bearing dust cap is simple and helpful. Doing this keeps your wheels happy. Remember to move slowly and with care so nothing gets hurt.


