

To remove primer from a car, use a solvent such as acetone or a specialized automotive primer remover, applying it directly to the affected area and wiping off with a clean cloth. Ensure the area is well-ventilated and wear protective gloves.
Removing primer from a car is a meticulous process, often necessary when pre-paint preparation doesn’t go as planned or when accidental overspray occurs. This task can be intimidating for car owners looking to maintain or restore their vehicle’s aesthetic value.
It’s important to choose the right product for the job to avoid damaging the car’s underlying paint or surface. A gentle, step-by-step approach, along with the correct materials and safety precautions, can effectively dissolve and clear away the unwanted primer. Whether dealing with a small spot or a larger area, the methodical removal of primer sets the foundation for a flawless finish on any auto body project. Maintaining precision and patience during the process ensures the vehicle’s surface is skillfully prepared for the next stages of painting or touch-up work.
Credit: www.popularmechanics.com
Introduction To Primer In Auto Body Work
Auto body work is both an art and a science, entailing meticulous attention to detail, from the initial body repair to the final coat of paint. The base layer of paintwork – the primer – is foundational for a pristine and enduring paint job. However, there may come a time when removing primer becomes necessary. This introduction will delve into the essence of primer and its role in auto body work while also addressing the circumstances that might lead to its removal.
Understanding Primer And Its Role In Car Painting
Primer serves as the intermediary layer that adheres to the bare metal of a car’s body and provides a surface for the paint to stick to. A well-applied primer ensures durability and the vibrancy of the topcoat. Typically, primer fills in small imperfections, leading to a smoother and more uniform surface. It also acts as a protector, preventing rust and other forms of corrosion on the metal body.
Car primer comes in various types, each tailored to different aspects of the painting process. Some common types include:
- Epoxy primer for its excellent adhesion and corrosion resistance.
- Urethane primer, which is known for its durability.
- High-build primer that helps in achieving a level surface.
Choosing the right primer is crucial for the best paint results and the longevity of the auto body work.
Situations Necessitating The Removal Of Primer
Despite its critical role, there are scenarios where primer removal is required. These situations include:
- Mistakes during the initial application that lead to an uneven or flawed surface.
- Old primer that has begun to crack or peel, indicating a compromised protective layer.
- Preparation for a custom paint job where the old layers must be entirely stripped for a fresh start.
Primer removal is a complex process and must be performed with precision to avoid damaging the car’s body. The next sections will provide a guide on the safest and most effective methods to remove primer from a car.

Credit: m.youtube.com
Safety Precautions And Preparation Steps
Removing primer from a car requires both precision and caution. Before embarking on this task, it’s crucial to understand the safety precautions and preparation steps necessary to protect yourself and create an appropriate work environment. Having a solid understanding of these fundamentals ensures a smooth, injury-free primer removal process.
Personal Protective Equipment: Ensuring Your Safety
Personal protective equipment (PPE) is non-negotiable when removing primer from your vehicle. The following items provide a defensive barrier against hazardous materials:
- Gloves: Use nitrile gloves to keep chemical strippers and paint solvents off your skin.
- Goggles: Safety goggles protect against splashes and accidental spraying.
- Respirator: A quality respirator or mask guards your lungs from inhaling toxic fumes.
- Long-sleeved clothing: Cover your arms to prevent skin irritation from any stray chemicals.
Setting Up Your Workspace For Primer Removal
Creating an optimal workspace is just as vital as personal safety. Follow these steps to establish a safe environment for primer removal:
- Choose a well-ventilated area, ideally outdoors or a garage with open doors and windows, to disperse harmful fumes.
- Ensure the area is clear of any open flames or sparks to reduce the risk of fire.
- Prepare drop cloths or plastic sheeting to protect the ground from chemical spills.
- Organize all tools and materials within reach for a streamlined workflow.
- Have a first-aid kit and a fire extinguisher nearby for emergency situations.
With your safety ensured and workspace prepared, you’re now ready to tackle the job of removing primer from your car efficiently and securely.
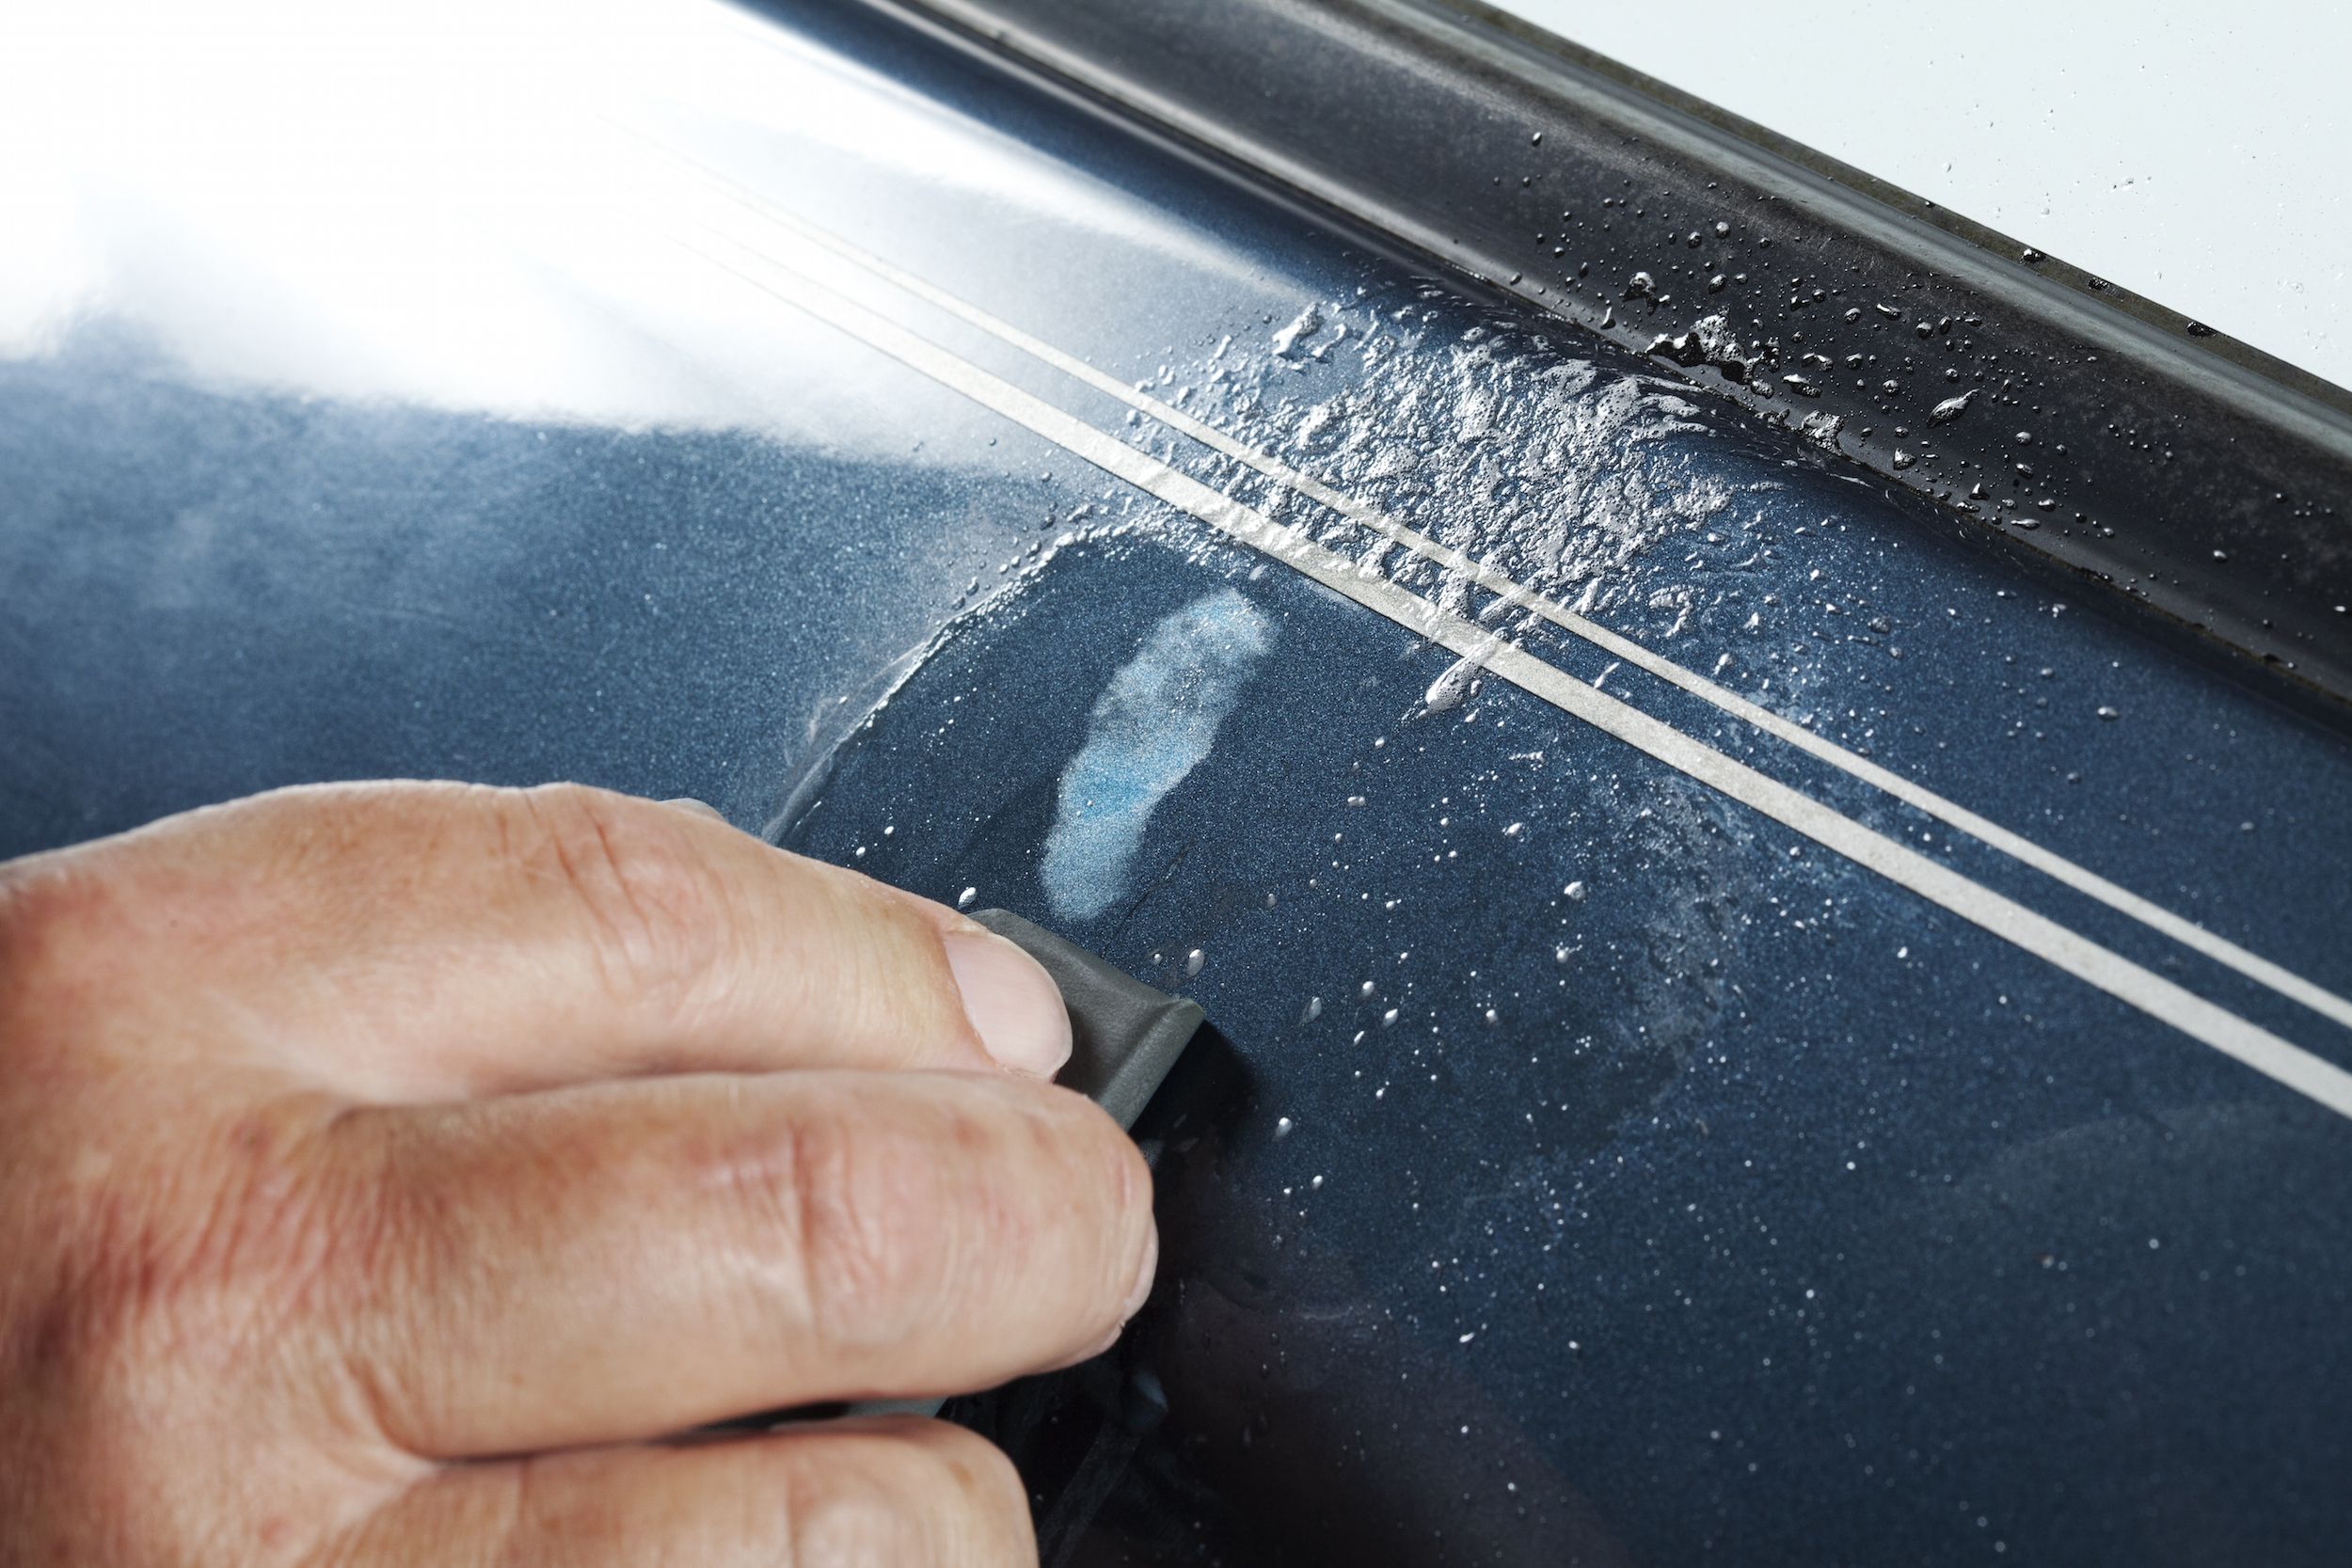
Chemical Methods For Removing Primer
Stripping primer from your car might sound daunting, but with the right chemical methods, you can tackle this project with confidence. Chemical strippers are robust solutions that penetrate and dissolve the bond between the primer and your vehicle’s surface, making removal a breeze. Before you start, consider safety precautions, ensuring that you work in a well-ventilated area with protective gear such as gloves and goggles. Familiarize yourself with the type of primer and the car’s surface material to select the ideal chemical stripper for the job.
Choosing The Right Chemical Stripper For Your Car
Selecting an appropriate chemical stripper is crucial for effectively removing primer without damaging the car’s underlying surface. Factors to consider include the type of primer, the car’s paint surface, and your level of expertise. Consult with professionals or visit automotive shops to get recommendations tailored to your needs. Look for non-corrosive formulas designed for automotive use to ensure safety and effectiveness.
Step-by-step Guide To Applying And Removing Chemical Strippers
- Prepare your work area by laying down drop sheets to catch drippings.
- Apply the chemical stripper evenly across the primer-coated areas, using a brush or spray gun, based on the manufacturer’s instructions.
- Allow the stripper to settle for the time specified on the product label, usually between 15 to 30 minutes.
- Once the primer begins to bubble or lift, scrape it off gently with a plastic scraper to prevent scratching the surface.
- Clean the area with a mild detergent and water to remove any residual chemical stripper.
- Finish by rinsing with clean water and drying the surface thoroughly.
Troubleshooting Common Issues With Chemical Strippers
Occasionally, challenges may arise when using chemical strippers. If the primer doesn’t come off easily, reapply the stripper for a slightly longer period, being careful not to overexpose the area as it may damage the surface. Inadequate ventilation can cause fumes to accumulate, so ensure to work in an open space or use fans to circulate air. If you notice any damage to the car’s surface, halt the process immediately and seek professional guidance. Adhering to the manufacturer’s guidelines and taking your time are key for a successful and damage-free removal.
Mechanical Methods For Stripping Primer
Whether you’re restoring a classic car or merely refining the bodywork of a vehicle that’s seen better days, removing old primer is a crucial step in the preparation process. Among the many methods available, mechanical strategies stand out for their effectiveness and efficiency. In this segment, we focus on mechanical methods for stripping primer, which includes manual and power tools designed to tackle this task head-on. Learn the ins and outs of each approach, including the advantages and disadvantages of mechanical methods compared to chemical solutions.
Using Sandpaper And Sanding Tools For Primer Removal
Starting with the basics, sanding by hand is a traditional method for removing primer that offers precision and control. While physically demanding, sandpaper can reach tight areas where power tools may struggle. Consider these steps when using sandpaper for primer removal:
- Select the right grit: Start with coarse grit to remove the bulk of the primer and work your way to a finer grit for a smooth finish.
- Even strokes: Use long, consistent strokes to avoid uneven patches and potential metal damage.
- Regular inspection: Frequently check the surface to prevent over-sanding.
Sanding tools, such as block sanders or orbital sanders, can expedite the process, achieving a more uniform result with less effort.
- Begin with a coarse abrasive disc to strip away the primer.
- Gradually switch to finer grit discs for a seamless surface ready for repainting.
Utilizing Power Tools: Tips And Techniques
Power tools elevate the removal process substantially. They offer rapid, efficient removal but require a careful approach to prevent damage. Here’s a guide to using these tools effectively:
| Power Tool | Tips |
|---|---|
| Angle Grinder |
|
| Dual Action Sander |
|
| Rotary Tool |
|
Pros And Cons Of Mechanical Vs. Chemical Methods
Mechanical Methods are characterized by their abrasive action against primer surfaces. They present immediate results and are excellent for environmentally conscious users who wish to avoid chemicals. Conversely, these methods can be labor-intensive and pose a risk of harming the vehicle’s body if not performed correctly.
- Pros:
- Control over the removal process.
- Minimal wait time compared to chemicals.
- No need for harsh chemicals.
- Can be cost-effective in the long run.
- Cons:
- Potential for physical fatigue.
- Risk of damaging the substrate.
- May require skill to achieve even results.
Chemical Methods involve the application of removers that dissolve or soften the primer for easier removal. These are less physically demanding and can strip large areas quickly. However, they include the use of toxic substances and require adequate ventilation and protective gear.
- Pros:
- Efficient for large surfaces.
- Less labor-intensive.
- Cons:
- Risk of harmful chemical exposure.
- Longer processing times.
- Environmental disposal concerns.
Aftercare And Surface Preparation For Repainting
Embarking on a car repainting project requires meticulous attention to the aftercare and surface preparation stage. Once you successfully remove the old primer from your car, the surface needs thorough care to ensure a flawless finish with the new paint coat. The right preparation not only guarantees a smooth substrate for repainting but also prolongs the luster and integrity of your car’s new look. Let’s dive into the vital steps you must take for cleaning and priming the surface with precision.
Cleaning And Neutralizing The Surface Post-stripping
Cleanliness is critical when preparing your car for a fresh layer of primer. After stripping off the old primer, the car’s exterior may be vulnerable to contaminants that can compromise the adhesion of new paint. Begin with a thorough wash using a gentle, automotive-grade detergent to remove any debris and remnants of the stripping agent. Below are essential steps and tips to ensure a properly cleaned surface:
- Rinse the surface with clean water to wash away loose particles and stripping chemicals.
- Apply the soapy water using a sponge or soft cloth, cleaning in a circular motion to avoid scratching the metal.
- Pay special attention to crevices and undercarriage areas where residue may accumulate.
- Rinse thoroughly again to ensure all soap is removed, as residual soap can interfere with primer adhesion.
- Dry the surface completely with a non-abrasive, lint-free towel or let it air-dry to prevent rust from forming on the exposed metal.
- Use a high-quality degreaser for final cleansing and to neutralize any remaining substances that could hinder paint application.
- Consider a pre-primer cleaner specifically designed to prepare automotive surfaces for priming.
After cleaning, a tack cloth can pick up any lingering dust particles that have settled. Ensuring a dust-free environment is paramount before proceeding to re-prime the surface.
Applying A New Layer Of Primer: Best Practices
Primer isn’t just an intermediary coat; it’s the foundation of a durable and glossy paint job. For superior adhesion and a flawless surface, follow these best practices:
- Select a primer compatible with your car’s material and the type of paint you’ll use. Consult an expert or refer to the manufacturer’s recommendations.
- Ensure the working environment is well-ventilated and dust-free to prevent airborne particles from settling into the wet primer.
- Protect adjacent areas with masking tape and paper to avoid accidental primer overspray.
- Apply the primer in even, light coats to avoid drips and sags. Multiple light coats are better than one heavy coat.
- Allow adequate drying time between each coat, following the primer manufacturer’s instructions.
- If required, lightly sand the dried primer with fine-grit sandpaper to create a smooth base for the paint. Remember to clean the surface again after sanding to remove the dust.
- Inspect the primed surface for any imperfections and repair them before applying the topcoat of paint.
Being precise and patient during the primer application will set the stage for an exceptional automotive paint job. Remember that excellence in this foundation phase ensures a spectacular finish that mirrors professional quality. Now that you’re armed with these best practices, the surface of your car will be impeccably prepared for that stunning new color.
Tips And Tricks From The Professionals
Understanding the best practices for primer removal can be the difference between a mediocre job and a flawless finish. Professionals in the automotive industry have honed their techniques through years of experience, but that doesn’t mean you can’t apply the same principles to achieve stellar results. In this section, we delve into the expert-advised ways to strip primer from your car’s body without causing damage, ensuring that the surface is perfectly prepped for a new coat.
Professionals often turn to certain tried-and-tested methods when it comes to efficiently removing primer. Below are some key strategies:
- Chemical Strippers: Deploying a chemical paint stripper can make the job much faster. Ensure you adhere to safety guidelines, wearing gloves and respiratory protection. Apply the stripper with a brush and allow it to penetrate as per the manufacturer’s instructions before scraping off the primer.
- Sanding: Sanding is a reliable method, either done manually with a sanding block for small areas or with a dual-action sander for larger surfaces. Start with a rougher grit and finish with a finer grit to ensure a smooth base.
- Media Blasting: This involves using a blasting cabinet where small particles are blown onto the car’s surface at high speed, effectively removing the primer. It’s a technique best handled by professionals due to the risks and equipment needed.
Each technique has its place, and sometimes a combination of methods yields the best results.
The process of stripping primer has the potential to harm your vehicle’s body if not done correctly. To prevent this, follow these steps:
- Gentle Handling: Always work gently, whether you’re sanding or scraping, to avoid creating dents or warping.
- Consistent Inspection: Frequently inspect the body for signs of damage or metal fatigue. Stop immediately if you find any issues.
- Proper Tool Usage: Use the right tools for the job. For instance, a plastic scraper can be less damaging than a metal one.
Risks are present, but with care and attention, you can safeguard your car’s body.
Post-removal, a professional-caliber finish is within reach by adhering to these steps:
- Surface Cleaning: After the primer is off, thoroughly clean the surface to remove any residue from the removal processes.
- Fine Sanding: Follow up with a fine sandpaper to smooth out any remaining imperfections. This will create a good surface for a new primer or paint to adhere to.
- Primer Application: With a smooth base ready, apply a new layer of high-quality primer, using even strokes to avoid streaking. Allow it to dry completely before proceeding with paint.
Taking the time to meticulously prepare and work the surface ensures a finish that rivals professional jobs.

Credit: www.jalopyjournal.com
Frequently Asked Questions On How To Remove Primer From Car
How Do You Remove Primer Paint From A Car?
To remove primer paint from a car, gently sand the area or use a rubbing compound. Follow by wiping clean with a microfiber cloth and soapy water. For stubborn paint, consider a commercial automotive paint stripper, but apply with caution to avoid damaging the car’s surface.
How Do You Remove Dried Paint Primer?
To remove dried paint primer, gently scrape the surface with a putty knife. Then, apply a solvent like mineral spirits or rubbing alcohol, let it sit briefly, and wipe clean. For tough areas, repeat the process or use fine-grit sandpaper.
Always follow manufacturer’s safety instructions.
How Do You Remove Primer Overspray From A Car?
Begin by washing the area with soapy water to remove any loose particles. Gently rub clay bar over the overspray marks. Wipe the surface clean with a microfiber towel. If necessary, apply a solvent-based cleaner specifically designed for car paint, and then rinse thoroughly.
What Removes Spray Paint Primer?
To remove spray paint primer, use acetone or a commercial paint stripper. Apply the solvent, let it work for a few minutes, and then scrub or scrape off the loosened primer. Always wear protective gloves and work in a well-ventilated area.
Conclusion
Removing primer from your car requires patience and the right techniques. Choose your removal method based on the situation and materials available. Safety is paramount, so always wear protective gear. With the steps outlined, you’ll tackle this task efficiently, keeping your vehicle’s body pristine.
Remember, practice makes perfect.


